Hello again, everyone! A few days ago, I was asked a question about running Selenium UI tests from Release Management. I knew it was possible, but I didn't know what the exact steps were. Now I do, so I figured I would share the knowledge with the world.
First, a word about automated UI testing: Automated UI testing is a very important component of your test suite. Ideally, you have a ton of unit tests to validate the logic of individual classes and methods, a bunch of integration tests to verify that all of the pieces of your application work together properly, and a small handful of automated UI tests, just to verify that your application's UI does what it's supposed to.
Microsoft has an awesome tool for automated UI tests available in the form of Coded UI. You can use Coded UI tests in conjunction with Microsoft Test Manager to set up test suites and test plans of both automated and manual UI tests. Release Management has out-of-the-box support for running automated tests from MTM, and if you're not doing any UI testing at all yet, I strongly recommend picking MTM as your automated testing tool of choice over Selenium.
That said, if you already have a nice suite of UI tests that are built in Selenium, that's fine! There's no need to throw them all away and rebuild them in Coded UI.
Selenium is similar to MTM in that you can execute your tests on a separate machine. In Microsoft-land, you have test controllers and test agents. The test control orchestrates the test automation and parcels the work out to one or more test agents. In Selenium-land, you have hubs and nodes, which perform the same functions.
So, the first thing you do is download the Selenium Server. I set it up on my laptop, which is going to act as both my hub and my node. It requires Java to be installed, so make sure you have Java, of course.
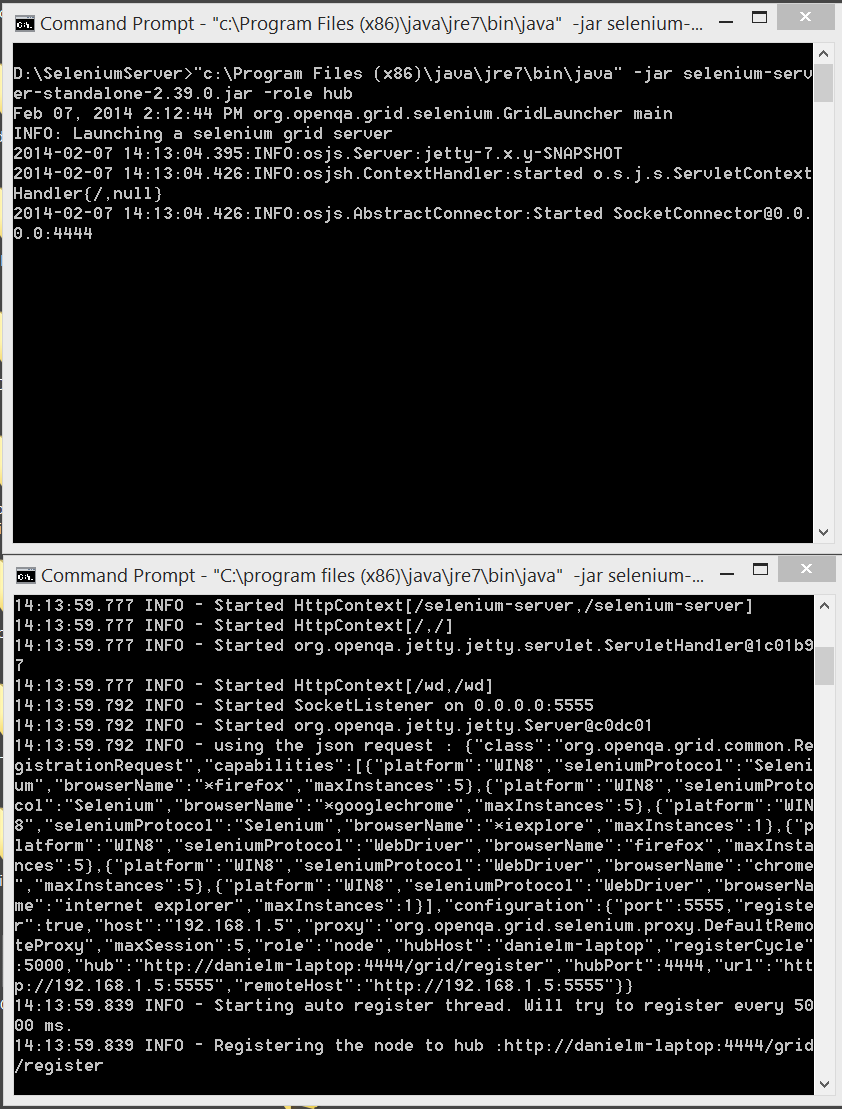
I ran the hub with the following command line. This tells my laptop to start listening on the default port and URL for my nodes.
D:\SeleniumServer>"c:\Program Files (x86)\java\jre7\bin\java" -jar selenium-server-standalone-2.39.0.jar -role hub
Then, I ran my node, which I told to connect to my hub by providing the hub's URL. I had to unblock these ports in my firewall! I believe the defaults are 4444 and 5555.
D:\SeleniumServer>"C:\program files (x86)\java\jre7\bin\java" -jar selenium-server-standalone-2.39.0.jar -role node -hub http://danielm-laptop:4444/grid/register
After a few seconds, I got a ton of crazy text. No error messages, though, so we're in business!
Okay, so now I have something that I can connect to in order to execute my tests. Now I actually need some tests! Here's the site I'm going to test:
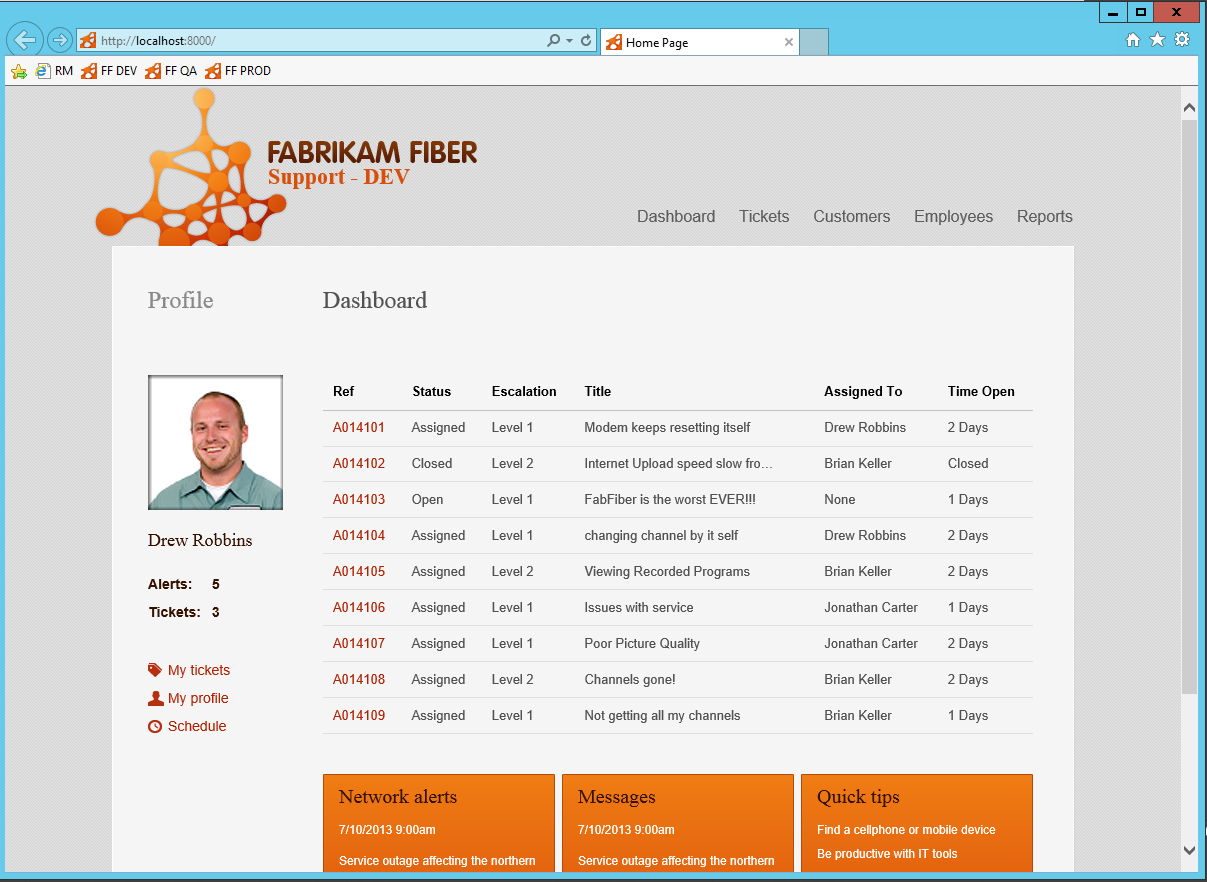
For demo purposes, I figured I'd just test whether the picture of Drew was displaying or not. I went to Visual Studio, added a new Test project, added the references to the Selenium assemblies (which are available on NuGet), and put together a silly, simple test:
    [TestClass]
    public class SeleniumTests
    {
        [TestMethod]
        public void CanFindProfilePicture()
        {
            var testUrl = System.Configuration.ConfigurationManager.AppSettings["SiteToTest"];
            var hubUri = System.Configuration.ConfigurationManager.AppSettings["HubUri"];
            ICapabilities capabilities = DesiredCapabilities.Firefox();
            IWebDriver driver = new OpenQA.Selenium.Remote.RemoteWebDriver(new Uri(hubUri), capabilities);

            driver.Navigate().GoToUrl(testUrl);
            var element = driver.FindElements(By.ClassName("profileImage"));
            driver.Quit();
            Assert.AreEqual(1, element.Count);
        }
    }
The first thing you might notice is that I'm pulling some values out of my app.config. This is because Release Management supports handling configuration files for you. So if we look at my app.config, it looks like this:
<configuration>

<startup>

<supportedRuntime version="v4.0" sku=".NETFramework,Version=v4.5" />

</startup>

<appSettings>

<add key="SiteToTest" value="__SiteToTest__"/>

<add key="HubUri" value="__HubUri__"/>

</appSettings>

</configuration>
I can let Release Management fill in the values of __SiteToTest__ and __HubUri__ later, as we'll see.
A few other things to note:
- I'm explicitly specifying what browser to test in. In this case, I'm using FireFox... just because FireFox was the easiest to get working! There are "drivers" for Internet Explorer, FireFox, Chrome, and just about any other browser out there. I'm hard-coding my test to FireFox, but you could easily modify this code to handle parameterizing the browser in the app.config, just like I did for the Hub URI and site to test.
- Once I connect to the Selenium hub specified in the app.config, I just navigate to my website, and test if I find any elements that have the CSS class "profileImage", then close down the browser that I tested in. Silly and simple!
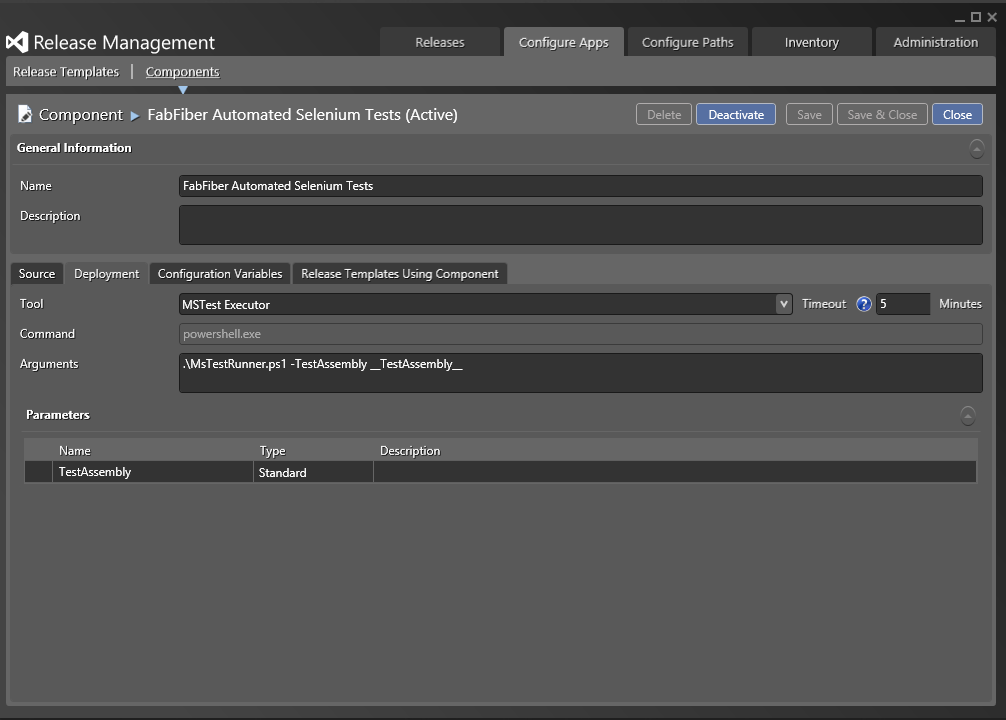
Now when we deploy our application, we want to run this test to make sure it works. In order to run the test, we need to execute it in the appropriate testing framework. I worked with MSTest, but you could adapt these instructions for NUnit or MBUnit or XUnit or whatever your testrunner of choice is. Release Management doesn't have anything out-of-the-box to run MSTest directly, since unit and integration tests should run during build, and it's expecting that you'll use the built-in MTM tool for running UI tests... so the first thing we need to do is create a "MSTest Executor" tool. Here's what my tool looks like in Release Management:

One important thing to note: You'll want to execute your automated tests on a machine that has your test framework of choice installed. MSTest installs alongside Visual Studio, and your deployment targets probably don't have Visual Studio installed. You could just create a "UI Test runner" server to act as a springboard to your automated tests. In my specific instance, I'm running everything except my Selenium node and hub all on the same server, so I already have MStest available. Anyway, I hacked together a little PowerShell script. This script does the following things:
- Runs the tests
- Grabs the test results and attaches them to your release in Release Management so you can view the results
- Fails the release automatically if any tests fail
It's an ugly little script, but it's functional. Use at your own risk! :)
param($TestAssembly)
$failedTests = $false
$output = &"C:\Program Files (x86)\Microsoft Visual Studio 12.0\common7\ide\mstest.exe" @("/testcontainer:$TestAssembly")
foreach ($line in $output) {
    write-host $line
    if ($line -match "\d/\d test\(s\) Passed\, \d Failed") {
        $failedTests=$true
    }
    if ($line.StartsWith("Results file:")) {
        $resultFilePath = $line.Replace("Results file:",[string]::Empty).Trim();
        $fi = New-Object System.IO.FileInfo $resultFilePath
        [System.IO.File]::Copy($fi.FullName, [System.IO.Path]::Combine($fi.Directory.Parent.FullName, "LastTestRunResults.trx"), $true)
    }
}
if ($failedTests) {
    exit 1
}
exit 0
So, with this script, I just add it as a Resource in Release Management and make sure I pass in the $TestAssembly parameter.
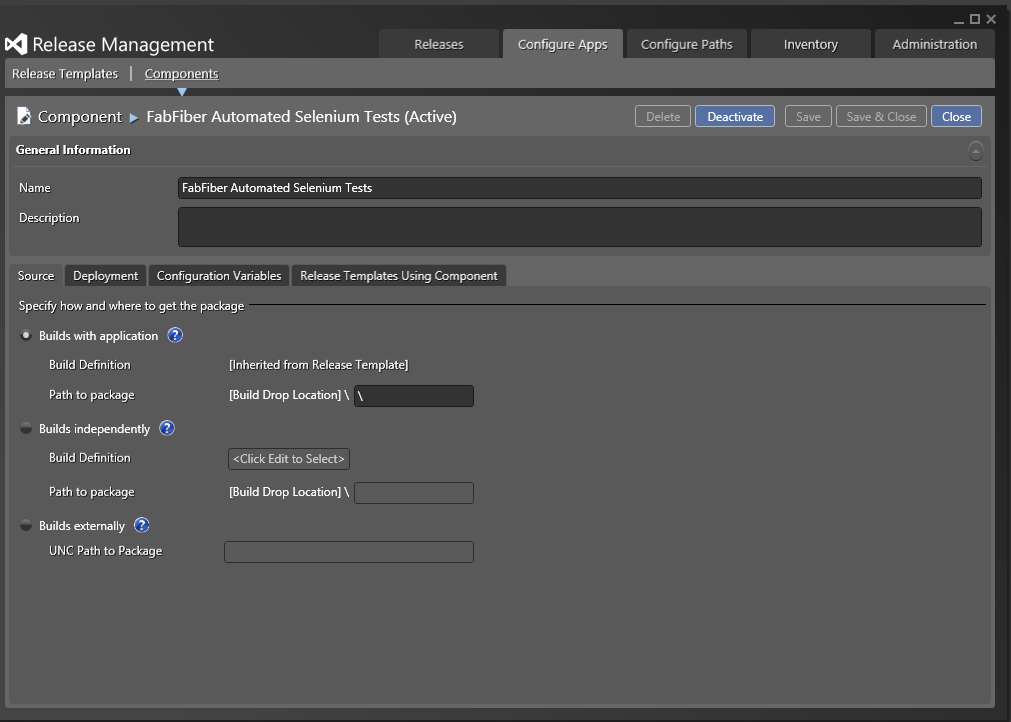
Now, I can make a new Component to leverage this tool to run my tests. I have an existing Release Template for this application, and it's already tied together with my build definition. As a result, I don't need to figure out where my test binaries come from -- they're already included with my build! I can just leave the default value here.
Next, we look at the "Deployment" tab. This is where things start to get interesting. I choose my "MSTest Executor" tool that we just added a minute ago, and leave all of the arguments as their defaults.
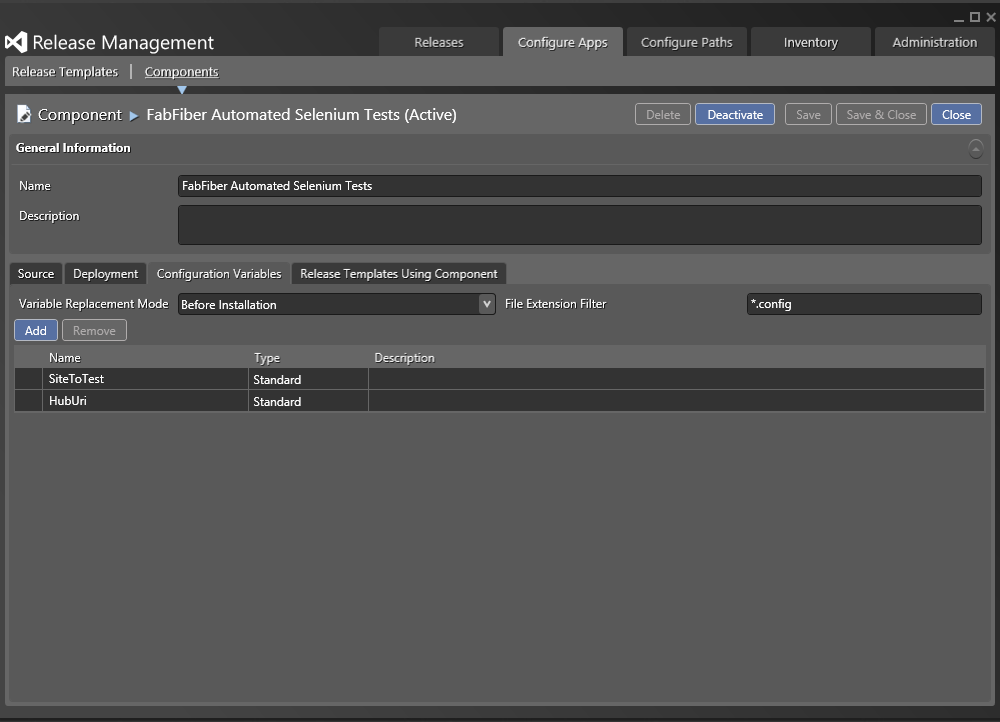
Finally, we look at the "Configuration Variables" tab. You can see that I've chosen to open up the app.config before we run the tests, and replace the values "SiteToTest" and "HubUri" with whatever values I provide when I use this component in my release template.
All that's left is to save the component, and then use it in a release template!
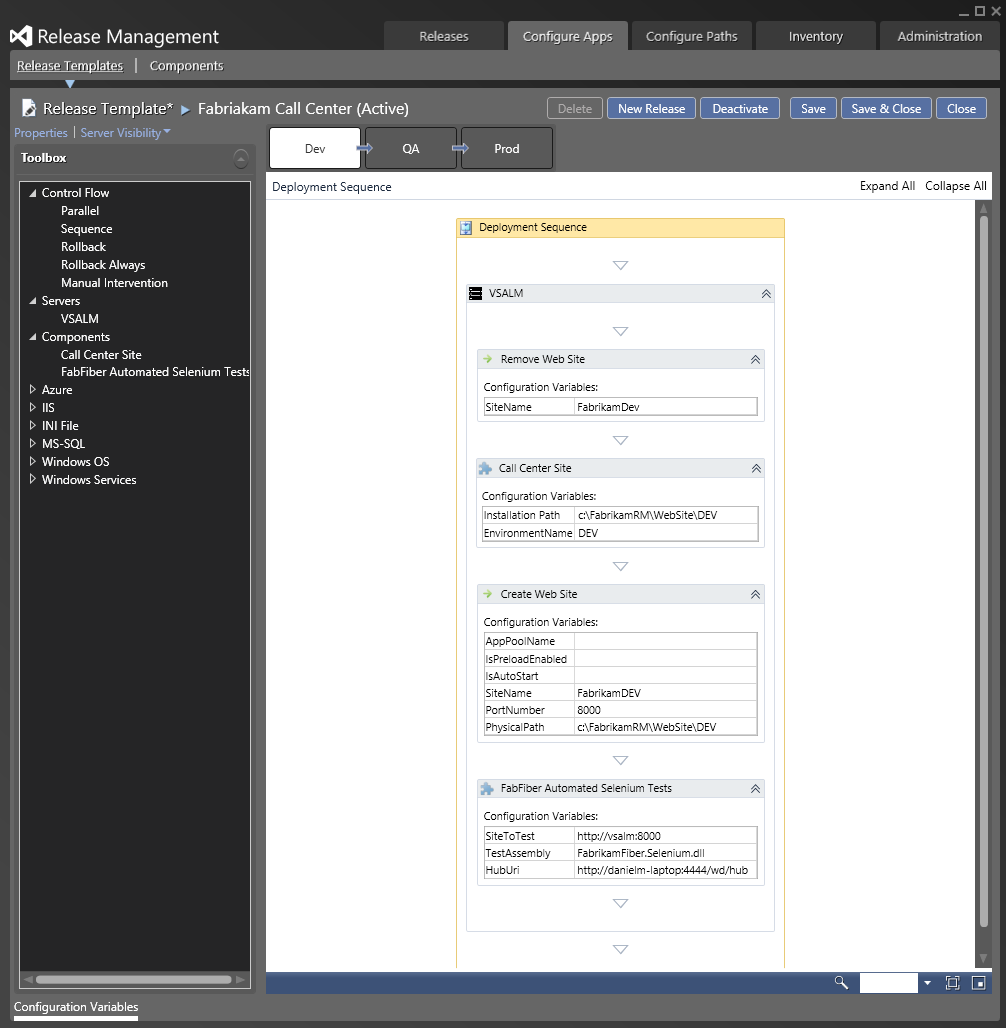
Looking at my existing release template for my website, I just dragged the "FabFiber Automated Selenium Tests" component from the toolbox into my deployment sequence as the last step, and filled in the necessary parameters for dev. I did the same thing for QA and for production, but with different Site URIs.
Now when we deploy the application, the tests will run! I checked all my changes into source control and kicked off a build of my application. When the build was complete, Release Management triggered a new release of my software. Let's look at the log:
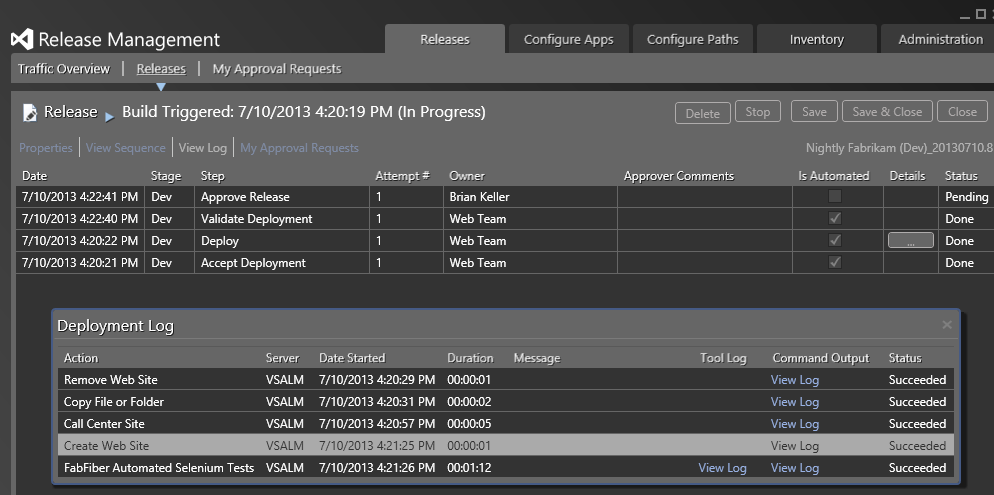
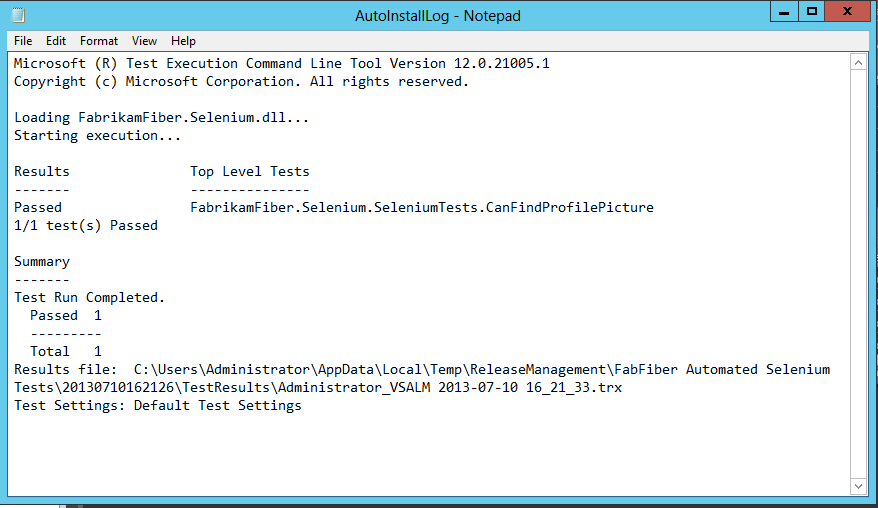
Hey, it succeeded! And we can click on the "View Log" under "Command Output" to see a log of MStest running:
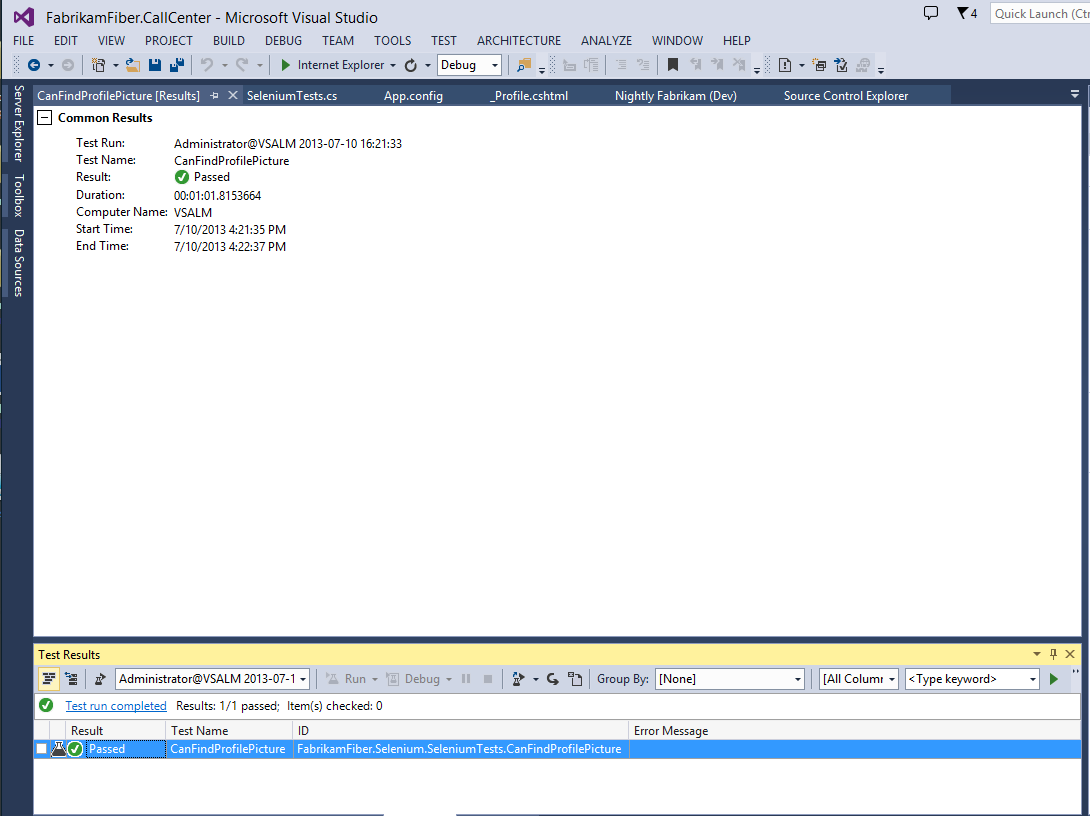
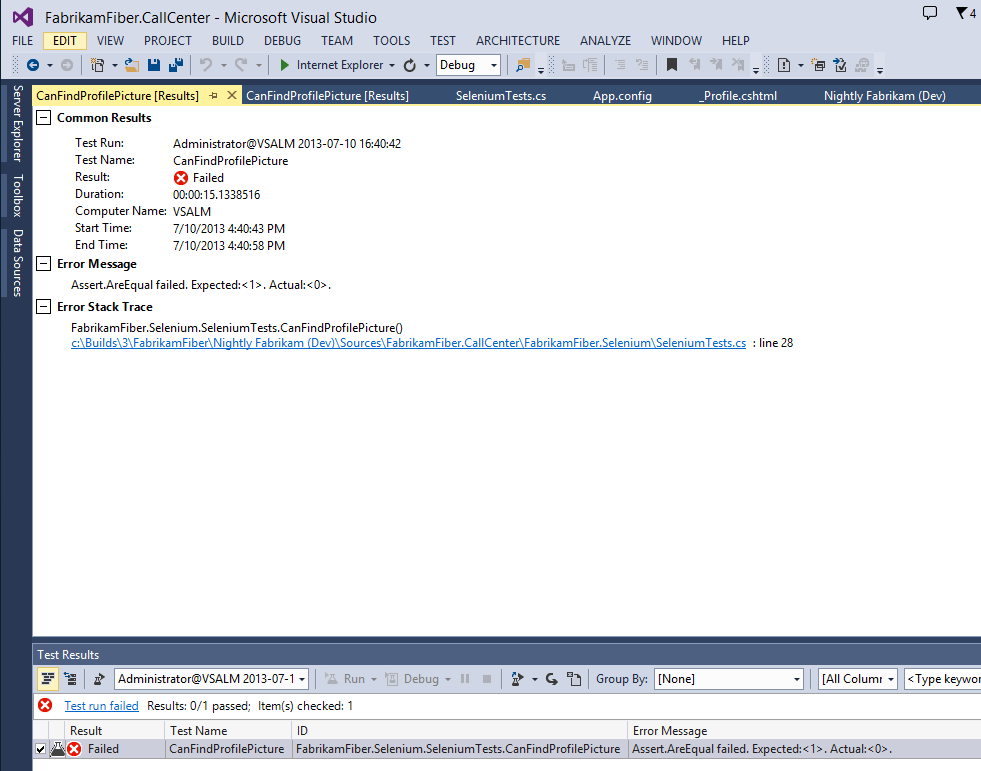
And cooler still, we can click "View Log" under "Tool Log" and the test result file will actually pop right open in Visual Studio!
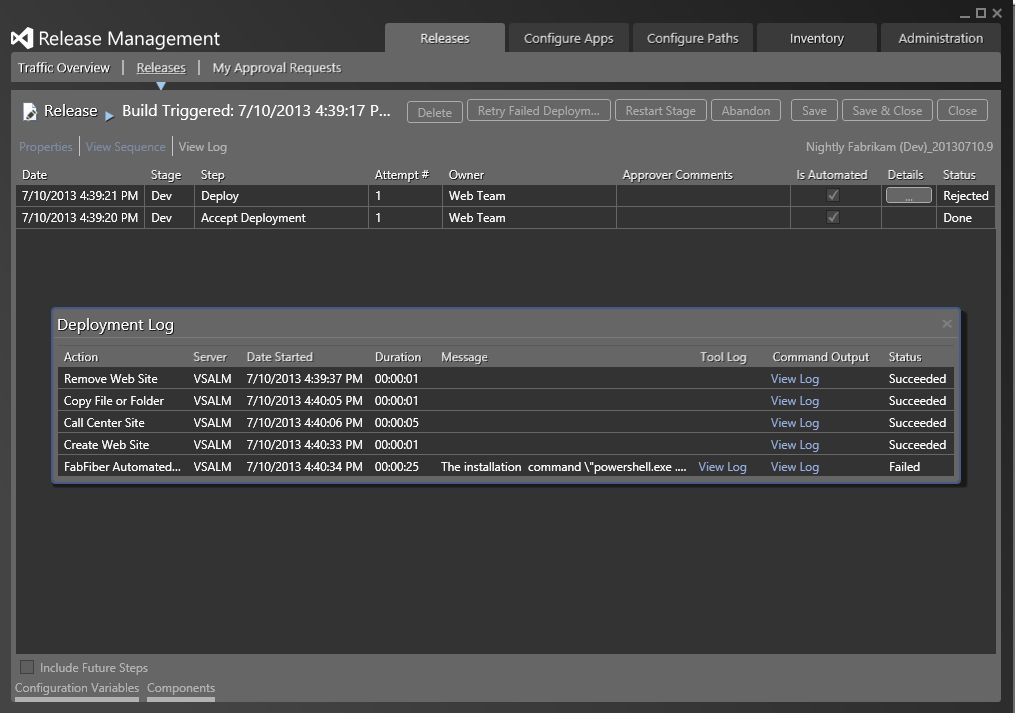
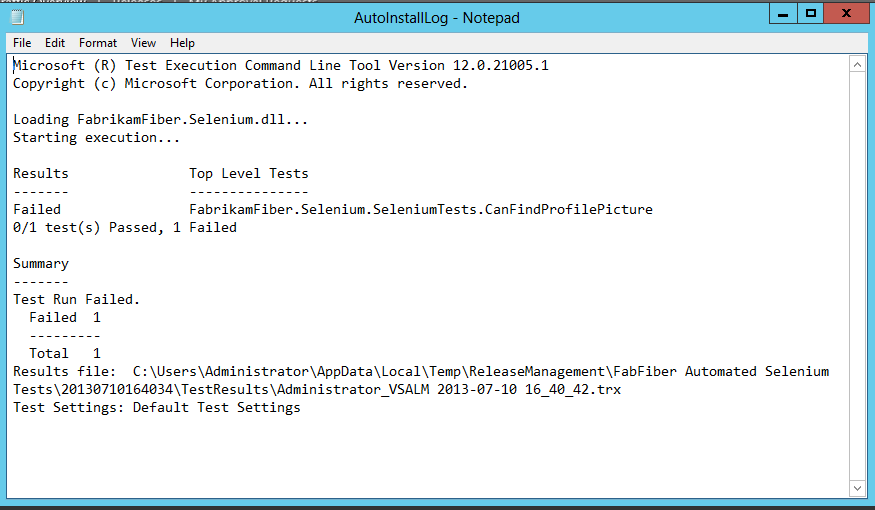
Now, if our test failed, we'd get slightly different results:
So there you have it! Selenium tests running after your software is deployed, automatically! To sum it up, all we did was:
- Set up a Selenium hub and node
- Wrote a Selenium test and pointed the Remote Driver at the hub
- Made a custom tool in Release Management to run tests via MSTest
- Made a component in Release Management that leveraged our custom tool
- Used the component to run our test
Easy, right? As you can see, Release Management for Visual Studio is incredibly flexible and powerful.