Okay, we're almost done! In the past three parts, we've gone over how to get TFS configured for Basic authentication, set up the cross-platform build agent, and get DNX installed. At this point, everything is working. All that's left is creating a build definition and running it!
First, make sure your cr
oss-platform build agent is running. If you remember from part 2, just switch to your agent folder on your build server and run node agent/vsoagent, then enter your credentials. That's all we'll need to do with the build agent -- if it's running, we're happy!
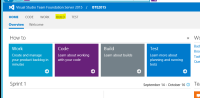
First, open up your browser of choice and navigate to your TFS 2015 app tier, choose a team project, and click the "Build" hub:
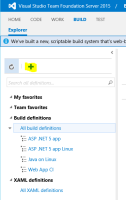
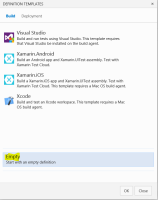
Once the build hub loads, add a new build definition by clicking the "+" button and choose the "Empty" template:
This should bring us to the empty definition screen:
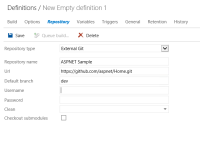
Before we add any build steps, let's set up some necessary stuff. Click on the "Repository" tab and change the repo type to "External Git", give the repo a name, and point the URL to "https://github.com/aspnet/Home.git" with the Default branch as "dev":
This will tell the build agent to connect to GitHub to clone the repo.
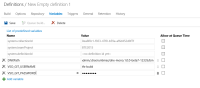
Under "Variables", we can set some variables that we'll be reusing in a few of our build tasks. Click the "Add variable" button and add a variable named "DNXPath" that points to the path of your DNX runtime environment. This should be under "/home//.dnx/runtimes//bin/". For example, my user account name is ictfs-admin, and I'm using DNX 1.0.0 beta 7 12364, so my path will be /home/ictfs-admin/.dnx/runtimes/dnx-mono.1.0.0-beta7-12364/bin
You can get the version of DNX that you're using by running dnvm list on the build agent machine -- you'll see output like this:
ictfs-admin@IC-TFS-BA-03Lin:~/build$ dnvm listActive Version Runtime Arch OperatingSystem AliasSomething else to note. If you're connecting to an actual Git repo hosted in TFS instead of an external GitHub repo, you'll need to define two variables: VSO_GIT_USERNAME and VSO_GIT_PASSWORD so that the non-domain-joined build agent can pass the correct credentials to clone your Git repo. You'll be able to tell that you need to do this if you get an Error 128 when cloning the repo during the build process. This isn't necessary with GitHub!
This screenshot shows everything configured for on-premise Git:
Note that you can make a variable encrypted by clicking the little lock icon next to the "Allow at Queue Time" check box. Neat!
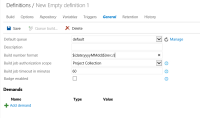
Under the "General" tab, add a build number format. I like using $(date:yyyyMMdd)$(rev:r), which will format it as, say, 20150815.1 -- this is just like the old XAML build system. We can leave the "Demands" alone. They're a great way to make sure your build agent has the appropriate tools necessary to run your build, but I'll cover that in another blog post, another day. Leave the demands alone! Make sure you choose the appropriate agent pool, as well. I put my Linux agents in an agent queue named "linux".
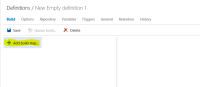
Now that all of that is done, click back to the "Build" tab, and we can start adding some tasks. The new build system doesn't have anything that I've seen for building DNX applications, but we can do all of it from the command line!
First, add a new "Command Line" step from the "Utility" tab:
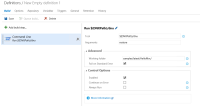
Then configure it to run $(DNXPath)/dnu with the arguments "restore". Set the working folder to samples/latest/HelloWeb/. Make sure "Fail on Standard Error" is checked so that if the dnu command fails, the build will fail. This step will restore our packages so we can build the application.
Add another "Command Line" step. This one will be to actually build. We have a few options for what we do here.
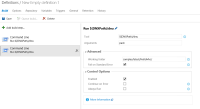
For our purposes today, we'll use pack. Set this step up pretty much the same as the previous step, but with the arguments set to "pack" instead of "restore":
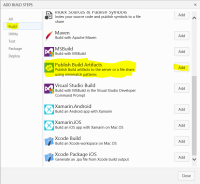
Now, finally, we want to publish our binaries. Add another build step, and choose "Publish Build Artifacts" from the "Build" tab:
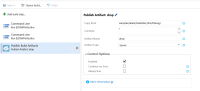
This will let us define what we move to our drop location, and where our drop location is. Our pack command is going to put everything into a /bin/Debug/ folder, so we want to just grab everything out of that folder.
Set "Copy Root" to samples/latest/HelloWeb/bin/Debug/. Set "Contents" to "*" so we grab everything. "Contents" can also take a file spec, so we could (for example) specify "**/bin/*" to grab everything under our Copy Root that is inside a "bin" folder. It's very powerful!
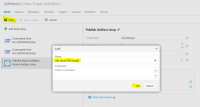
Give your publish artifact a name -- I chose "drop" -- then choose an artifact type. You can choose "Server" if you want the artifacts to be stored in TFS, or you can choose "File Share" and enter a share location on a UNC share. I'm choosing "Server":
Now click Save:
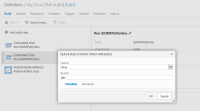
Now click "Queue build..." and then "Run":
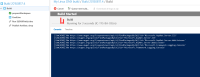
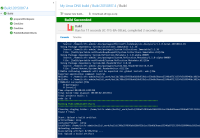
You should see the build run and complete pretty quickly:
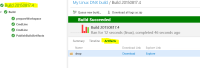
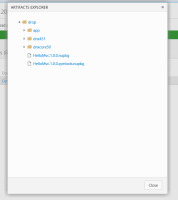
Once the build is done, you can view the artifacts by clicking on the build summary link, then the "Artifacts" tab:
And you can see what's going on in the artifacts by clicking the "Explore" tab:
And that's all there is to it. You now have a DNX package that's ready to be deployed to any environment that has DNX installed and configured. Before you know it, you'll even be able to deploy a DNX package to a Docker container, for true cross-platform .NET goodness!